
Table of Contents
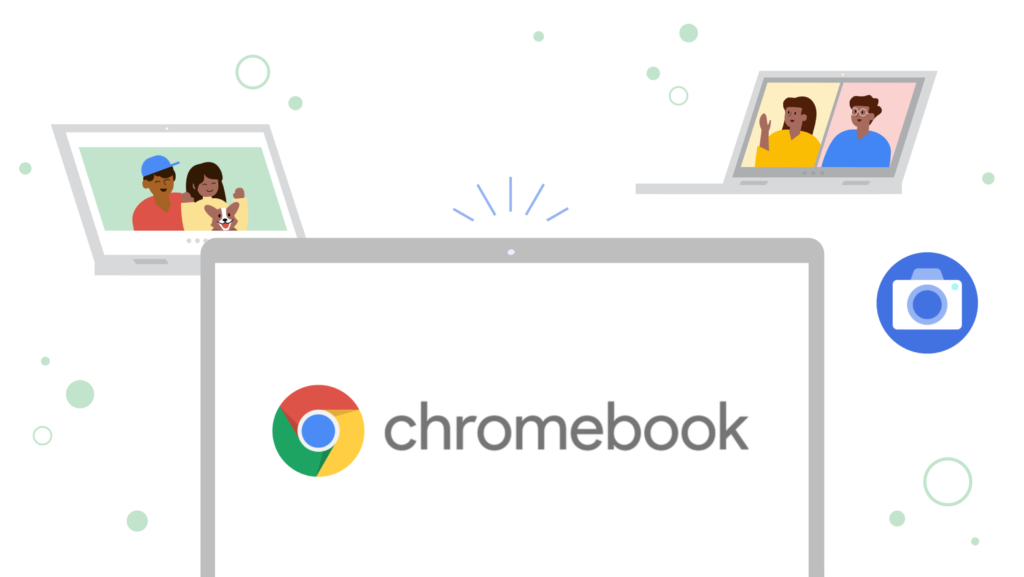
Chrome OS laptops are popular due to their portability, Google app optimization, and long battery life. Transferring data from an Android device to a Chromebook is also a simple process. There are numerous options available, including USB and third-party software programs. Follow the steps below to learn how to transfer data from your Android device to your Chromebook.
The ChromeOS team is devoting more time and effort to expanding the ecosystem than ever before. It’s simple to transfer photos between your Android phone and Chromebook. While some tasks can be completed natively and wirelessly, others necessitate the use of cables. There are three methods for transferring images from Android to ChromeOS.
How Do I Get My Photos From My Phone To My Chromebook?
There are several methods for getting pictures from your mobile device onto your Chromebook. One example of a third-party app that could be used in this situation is Phone Transfer. Chrome OS includes the Photos app as well.
What is the best method for wirelessly transferring photos from my Android to my Chromebook?
There are several methods for transferring photos from a mobile device to a Chromebook. You can employ a third-party app such as Phone Transfer. Chrome OS includes the Photos app as well.
What’s up with my Android phone’s photos not syncing with my computer?
There could be several factors at work here. Before you begin, make sure that your phone and computer are both connected to the same Wi-Fi network. If this isn’t the case, reconnect your phone to the network and try importing the photos again. Second, ensure that the photo file format on your phone is compatible with your computer. Finally, make sure your computer has the necessary photography software.
1. First Method
- Connect to your Chromebook first.
- Access your Chromebook device.
- Remove the SD card from your camera to make a backup.
- Insert the SD card into the Chromebook’s SD card slot. Insert the USB device into any USB port that is available.
- Contact the Chromebook’s manufacturer if you are unsure which slot is the SD card slot. An SD card slot is not available on all Chromebooks.
- Step 2: Make a backup of your photos.
- Install the Google Photos Android app from the Google Play Store on your Chromebook. Discover how to install Android apps.
If you see the option “Allow Photos access to your device’s photos, media, and files,” do the following:
- The permit should be selected.
- From the “Back up & synchronize” menu, select Activate backup.
- You cannot back up or synchronize your data if you do not see the “Back up & sync:” option.
- In the upper-right corner, select your profile picture or initials.
- Choose Photos, then Backup & synchronization.
- Backup and synchronization are required.
- Select On device from the left-hand navigation bar.
- Choose the folder to be backed up.
- Backup and synchronization are required.
- You’re backed-up photos will be visible in Google Photos and will count toward your Google Drive storage quota. Investigate the connection between Google Drive and Google Photos.
ALSO READ: How To Increase The Battery Life Of A Laptop Windows 11?
2. USB Cable
Modern workflows are difficult to imagine without a smartphone and a laptop. As a result, many people value the ease and speed with which files can be transferred between devices. There are several methods for transferring files between a Chromebook and an Android phone. Data can be transferred via USB cable or wirelessly through cloud storage and third-party applications.
The Chromebook supports USB file transfer, and the procedure is similar to that of transferring files to Mac and Windows; it is simple to learn. Here’s a step-by-step guide to “How to Transfer Files from an Android Phone to a Chromebook”:
- Unlock your phone and connect it to your Chromebook using a USB cable.
2. Select “File Transfer” from the “Use USB for” drop-down menu after clicking the “Charging device via USB” notification.
Your Chromebook will launch the File app. You can now begin dragging the required files.
4. When you’re finished, remember to unplug the USB cable.
Although the Android to Chromebook file transfer cable is reliable, the process is slow. If you need a fast transfer rate or advanced features, look into other options.
3. Phonehub
The Phone Hub in ChromeOS is a collection of ecosystem features. Among other things, it allows you to turn on your phone’s hotspot directly from your Chromebook, access your recent Chrome tabs, locate your phone, and sync notifications from your phone to your Chromebook. You can now view photos from your mobile device without transferring them to your Chromebook. There are, however, prerequisites and an installation procedure. To begin, your phone must be running Android 8 or later, and your Chromebook must be running ChromeOS 103 or later. If your devices are eligible, you can configure them using the instructions below.
1. In the Chromebook’s lower-right corner, click Time. Then, click the cog icon to access the ChromeOS Settings app.
2. Click the Setup button next to the Android phone after selecting Connected devices. To finish the setup, enter your Google password for confirmation.
3. ChromeOS will choose the device on which your Google account is currently logged in.
4. Select it and toggle the Recent Photos option to on.
5. Open the System Settings app on your device. Scroll down and select Google.
Navigate to the “Devices and sharing” section of the Google Settings page. Then, as the device type, select Chromebook.
Enable the toggle next to Photos and media. (If this option does not appear, make sure your phone is already connected to your Chromebook.)
Clicking the Phone icon in the Chromebook dock now gives you access to your Android phone’s most recent photos. Simply clicking on a photo will allow you to download and view it on your Chromebook without having to transfer it from your mobile device.
4. File transfer with SnapDrop for Android
There are a plethora of third-party file transfer apps for Chromebook Android. SnapDrop is a peer-to-peer (P2P) file transfer service that allows files to be exchanged between two devices running any operating system. SnapDrop is a Progressive Web App, which means it can be accessed via the web. As a result, you can transfer files by launching the web app in your browser.
SnapDrop is similar to AirDrop, which iPhone users will notice. To share files, simply launch SnapDrop on both devices. Your devices must all be connected to the same network.
READ MORE: My Phone Says Insufficient Storage But I Have Space, How To Fix It?
5. Transfer Through Third Party apps
Although sharing in the Community Phone Hub is convenient, it only shows the four most recent photos from your phone. This is where Nearby Share comes into play. AirDrop on Android and ChromeOS are comparable. Before you begin, you must configure Nearby Share on both your Android phone and Chromebook. Following that, file sharing between the two devices is possible.
Bluetooth and Wi-Fi must be turned on for nearby sharing to work. As a result, make sure they are enabled on both devices.
1. Open your Android device’s Gallery app, select photos, and tap the Share icon.
2. Select Nearby Share from the Android share sheet’s menu. Some gallery apps have their own share sheet, which may or may not includes Nearby Share. If this is the case, the share sheet should show you additional options for accessing the default Android share sheet.
3. Sign in to the same Google account on your Chromebook and the nearby Chromebook that has Wi-Fi and Bluetooth enabled, and your Chromebook should be visible in the Nearby Share menu. Tap it to turn it on.
4. To enable Nearby Visibility, click the time icon in the lower-right corner of your Chromebook, followed by Nearby Visibility. Chromebook should now appear in the Nearby Share panel of your Android device.
You will be prompted to accept the files from Nearby Share on your Chromebook. Accept the offer.
The transfer to your device should begin after you accept the photos. Similarly, photos can be transferred from Chromebook to Android. Open the Files app on your Chromebook. Choose the images you want to share. Then, click the Share button. The Nearby Share option must be visible on the share sheet. Simply click on it.
6. Android file transfer for Mac and PC
Your search for a file synchronization Mac app to easily transfer photos from Android to Mac is over if you use macOS devices. MacDroid is a macOS app that allows you to easily transfer photos, videos, and folders between these two devices. MacDroid can also be used to transfer and listen to music whenever and wherever you want. Furthermore, you can edit Android files on your Mac without having to transfer them.
- To begin, download and install MacDroid on your Mac. Install the application as directed.
- Connect your Android device to your Mac using a USB cable. Launch MacDroid and go to the main menu and select “devices.”
- Select between ADB and MTP connection modes. Then, follow the instructions to allow the computer to access Android data.
- Finally, there you have it! Now that your device is connected to your Mac, launch the Finder and start transferring files.
7. USB data transfer
While using the same Google account speeds up and even eliminates the need for Nearby Share, it can also be unreliable at times. The transfer could be slow, or the two devices could be unable to connect. A USB cable is essential when transferring a large number of photos from Android to Chromebook or vice versa.
- Using a USB cable, connect your Android phone to your Chromebook.
- On Android, a pop-up will appear. To allow data transfer between devices, select the File Transfer option.
- Start the Files app and choose your device from the left sidebar. You should be able to see the files saved on your Android device here.
- Choose the photos you want to transfer, then right-click and select Copy.
- Next, navigate to a system folder and paste the files there by right-clicking and selecting Paste. You can also drag and drop photos to your system, but doing so deletes the images from your phone.
- Transferring photos from a Chromebook to an Android smartphone is a similar process. On your Chromebook, select the images, then right-click and select Copy. Select the Phone drive in the sidebar and copy the desired photos.
8. Transferring Photos from an iPhone to a Chromebook
Connect an iPhone to a Chromebook using a USB cable. Even on iOS 14, you can connect your iPhone to a USB-to-Lightning cable if you prefer “old school” technology. Simply connect an iPhone to a Chromebook via USB, grant permission when prompted, and the iPhone’s photo data will be displayed in the Chrome OS Files app.
After navigating through a few folders to find the iPhone photos you want to transfer, it’s as simple as dragging and dropping them into your Chromebook’s local storage. Notably, if you connect an external drive with photos to a Chromebook, you will almost certainly be prompted to automatically upload those photos to Google. When transferring photos from an iPhone to a Chromebook, this action has no effect.
READ NEXT: Why Does My Phone Says Unfortunately System UI Has Stopped Working? (Easy Ways To Fix)
Five Workarounds for Google Photos Not Syncing
This section describes five common mobile device fixes for the “Google Photos is not syncing” error. And, depending on your circumstances, you can select the best option.
Method 1: Enable backup and synchronization.
Even though Backup & Sync is enabled by default, you should double-check its status. If you disable this service, the synchronization task will fail and your local photos and videos will not be synced to Google Photos and vice versa. Here’s how to check the status of your backups and syncs.
- Sign in to Google Photos with your Google account on your mobile device.
- To enable it, go to the “Photos settings” menu.
Method 2: Delete the cache from Google Photos.
- As previously stated, too much cache will have an impact on the synchronization process. If your Google Photos app isn’t syncing, clear the cache. You can now access the following content:
- Users of Android: To clear the cache, go to Settings > Apps > Photos > Storage > CLEAR CACHE. Then, launch Google Photos to put it to the test.
- To delete the application from the iPhone, go to Settings > General > iPhone Storage > Google Photos. This option clears the app’s data and cache. Then, from the App Store, reinstall the Google Photos app.
Method 3: Assess the Power
- Background applications are disabled when your device is in “low battery mode.” There is also a way to check your power on your smartphone.
- Allow Background Activity in the Settings > Apps > Photos > Battery menu for Android users. This enables Google Photos to sync in the background.
Method 4
- Examine the Current Status of Your Google Photos Backups
- The backup status can be viewed when logged into Google Photos. You can also check the status to see how far the sync has progressed. Many options are available by accessing your account profile.
- If all of your photos have been successfully transferred to Google Photos, the backup status will be “Backup complete.”
- If Backup & Sync is disabled and you are unable to upload photos from your local devices to Google Photos, the message “Backup is disabled” will appear.
- If your photos are being backed up, the backup status will be “Getting ready to back up.”
- The status will be “Waiting for connection” if your phone is not connected to cellular data or Wi-Fi.
Method 5: Uninstall and reinstall Google Photos
- If your Google Photos version is out of date, you should update it by going to the app store, searching for Google Photos, and selecting “Update.”
- If Google Photos is still not syncing after updating the app, you can uninstall and reinstall it. On any Android or iOS device, simply delete the app and reinstall Google Photos from the app store.
- If you’re tired of the problems that Google Photos causes and want to stop using it, you can compare Google Photos to iCloud to decide whether or not to switch.
The most effective solution for Google Photos failing to sync across devices

Although the methods described above can help you solve the problem to some extent, they may not be as effective as you believe. If the problem persists after attempting the solutions listed above, you can sync photos and videos on Google Photos in a different manner. That is, syncing files from local devices to Google Photos with MultCloud.
MultCloud is a top cloud file manager that lets users manage multiple cloud services from a single interface. MultCloud, on the other hand, is a web-based application that integrates with a number of popular cloud storage services, including Google Photos, Google Drive, OneDrive, FTP, MEGA, and Dropbox.
You won’t have to worry about the “Google Photos has stopped syncing” error if you use MultCloud. The following section will walk you through the process of syncing files from your local devices to Google Photos.
If you are having problems with Google Photos, you can use another cloud service, such as OneDrive, Dropbox, or another. Transferring data from Google Photos to another cloud is critical in this situation. MultCloud’s Cloud Transfer feature allows you to easily transfer data from one cloud to another. Transfer Google Photos, for example, to Flickr.
You can fix the “Google Photos not syncing” problem by using one of the solutions listed above. In short, enable Back up & sync, clear cache on Google Photos, and check the power and backup status to resolve this issue. Furthermore, if you’re tired of dealing with Google Photos issues like not backing up and syncing, you can use MultCloud to directly sync your files from local devices to Google Photos.
Conclusion
To conclude, In addition to the methods listed above, there are numerous others for transferring photos from an Android phone to a Chromebook and vice versa. To transfer data between devices, a USB stick can be used instead of a USB cable. To transfer photos between Android and Chrome OS devices, Bluetooth can be used instead of Nearby Share.
Those who prefer to exchange files wirelessly can use Google Drive to upload files to a phone’s disk, then to a computer if necessary, and vice versa. Another excellent option is to use third-party apps that support file transfer on an Android Chromebook which we have already discussed in the above-mentioned points; some of these apps even eliminate the need for USB cables. What is your preferred file transfer method do let us know.
MUST-READ: My TV Is Showing No Signal How To Fix It?